Ever wonder how your favorite YouTubers grab your attention from the very first second? Learning how to make a great video intro isn’t about mastering complicated software. It’s about a simple, smart plan: figure out its job, keep it short, and make sure it screams you. This is what separates an intro people skip from one that gets them hooked.
Your Blueprint for an Unforgettable Intro
Before you even think about opening a video editor, the most important work happens with a pen and paper (or a Google Doc). A killer video intro is more than just cool animations; it’s a tool designed to do a specific job. Jumping straight into making it without a clear plan is like trying to build a LEGO set without the instructions—it might look cool for a second, but it’s probably going to fall apart.
This planning phase is all about asking the right questions. What, exactly, do you want this intro to do? The answer will guide every single choice you make, from the music you pick to how your logo pops on screen.
Pinpoint Your Intro’s Main Goal
Every awesome intro has one clear purpose. It’s not just a fancy clip at the beginning; it’s working hard for you in those first few seconds. So, what job does your intro need to do? Is it supposed to make you look super professional and trustworthy, or is it there to get viewers hyped up with a burst of energy?
Most intros do one of these things:
- Build Brand Recognition: This is all about getting your logo, colors, and name stuck in your viewer’s head. The goal is simple: when someone sees your intro, they instantly know it’s one of your videos.
- Set the Mood: An intro is like a movie trailer for your video. It tells viewers what kind of vibe to expect. A slow, dramatic opening feels very different from a fast, glitchy one.
- Create Excitement: Sometimes, the goal is just to build up some hype. A quick, punchy intro can be the perfect “get ready!” signal before you jump into the good stuff.
This infographic breaks down the essential planning flow into three simple stages.
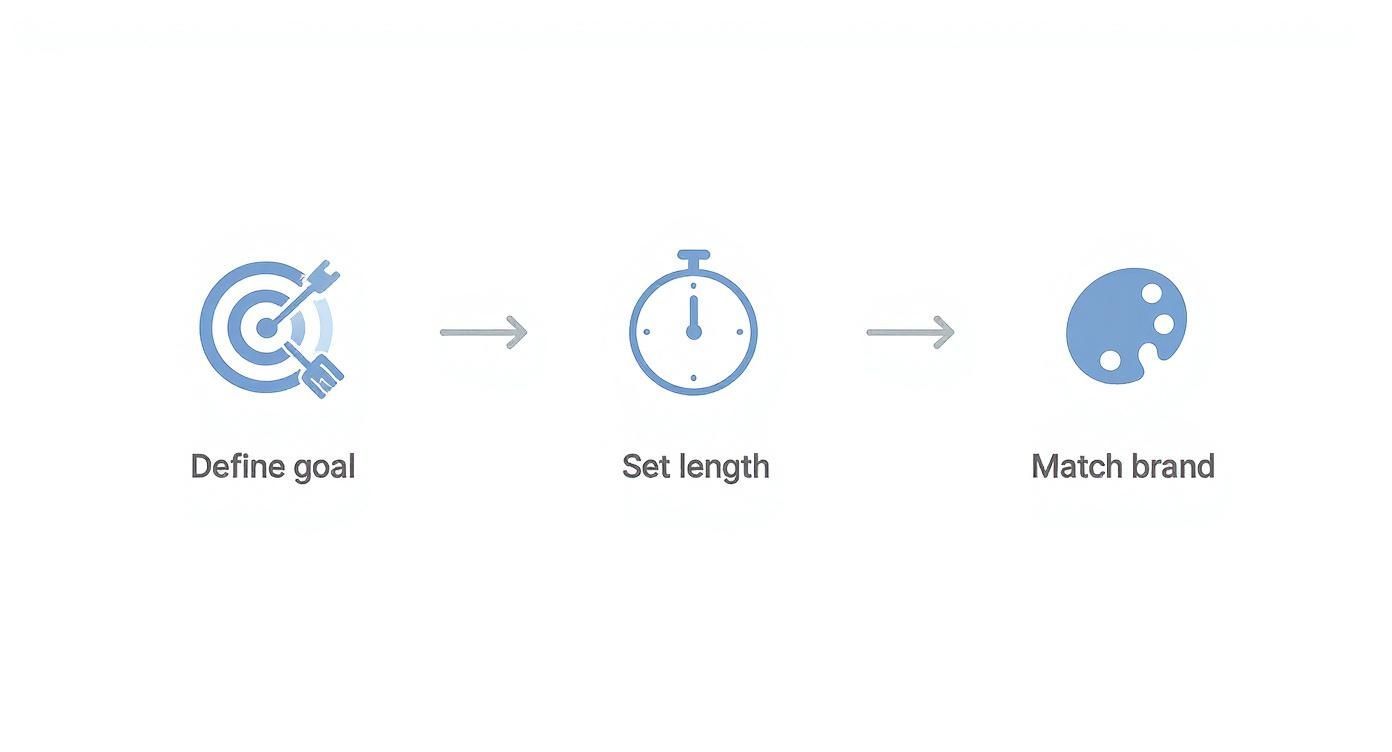
As you can see, figuring out your goal is step one. From there, you can decide on the right length and make sure everything matches your brand’s style.
Here’s a quick checklist to help you nail down these basics before you start creating.
| Intro Planning Checklist |
|—|—|—|
| Planning Step | What to Ask Yourself | Simple Example |
| Define the Goal | What’s the #1 thing I want viewers to feel or know after seeing this? | I want them to get excited and know this is a high-energy gaming channel. |
| Determine Length | How much time do I really need to do that? Can I make it faster? | 4 seconds. Quick enough to not be annoying, but long enough for the logo to sink in. |
| Align with Brand | Do the colors, fonts, and style match my other videos and social media? | Yep, I’ll use my main brand colors (neon green and black) and my channel’s font. |
Thinking through these points first will save you a ton of time and frustration later.
Master the Goldilocks Rule of Length
When it comes to intros, shorter is almost always better. The perfect length—the “Goldilocks zone”—is between 3 and 7 seconds. Go much longer, and you risk viewers clicking away before your video even starts. Go any shorter, and your branding might be too quick for anyone to notice.
A great intro doesn’t waste time. It respects the viewer’s attention by getting its message across quickly, making them more likely to stick around for the actual video.
The huge amount of money spent on video ads shows just how important it is to grab attention fast. As of 2024, companies are spending a whopping $191.4 billion on digital video ads. That number proves how much businesses value video, and a strong intro is the key to making that investment worth it.
Weave in Your Brand’s Personality
Finally, your intro has to feel like you. Think of it as a part of your channel’s personality. This means using your logo, colors, and fonts in a way that feels familiar to your audience. Your logo should be easy to see, and your brand colors should be front and center.
The font you choose says a lot, too. A clean, modern font creates a totally different vibe than a fancy, old-school one. Being consistent is what matters; it helps people recognize and trust your content. If you’re looking for ideas, you can explore a bunch of pop-culture fonts that can add a unique personality to your intro. The key is to make every little piece work together to tell your brand’s story in just a few seconds.
Sketching Out Your Visual Story
Okay, you’ve got a solid plan. Now it’s time to stop thinking in words and start thinking in pictures. This is the fun part where we turn those ideas into something you can actually see. Think of it like creating a mini-comic strip for your intro. You’re mapping out what happens, frame by frame.
Doing this first saves you a world of headaches later. It makes sure your final animation has a point, feels well-paced, and nails your brand’s vibe before you get lost in editing software.
From Idea to Storyboard
Let’s be clear: a storyboard doesn’t need to be a work of art. Seriously, stick figures and messy shapes are your best friends here. The whole point is to map out the order of events and get a feel for the timing. This simple step turns your ideas into a real roadmap for the animation phase.
Start by breaking down your intro’s short lifespan—let’s say it’s 5 seconds—into key moments. For each main frame, ask yourself a few questions:
- What’s happening on screen? Is the logo flying in? Is a tagline fading into view?
- Where should the viewer look first? You need to guide their eyes to what’s important in that split second.
- How long does this moment last? Maybe your logo reveal gets a full 2 seconds, while your channel name appears for the final 3.
For example, a storyboard for a gaming channel might show a quick sketch of a glitchy effect, then a frame with the channel name exploding onto the screen, and a final frame where the logo pulses with a cool sound. Drawing this out helps you feel the rhythm of the intro before you even open your software.
Choosing Your Visual Style
The visual style of your intro is its personality. It’s the first impression you make, and it has to match the video that comes after it. Are you a clean, minimalist tech channel, or a loud, energetic fitness brand? Your style should answer that question for the viewer instantly.
Here are a few common styles and the message they send:
- 2D Motion Graphics: This is what most creators use. Think clean lines, bold text, and smooth animations. It’s super flexible and works perfectly for business, educational, or modern lifestyle channels. It says “I’m professional and clear.”
- 3D Animation: This style adds depth and realism, making things look bigger and more impressive. 3D intros feel more premium and movie-like, making them a great fit for entertainment, high-end tech, or gaming channels that want to look epic from the start.
- Stop Motion or Hand-Drawn: For creators with a more quirky or artistic brand, these styles feel super personal and authentic. They show off your creativity and a real human touch.
Your visual style is your brand’s handshake. A mismatch can be weird—imagine a serious video about finance opening with a bubbly, cartoonish intro. It just doesn’t fit. Being consistent builds trust and lets viewers know they’re in the right place.
Ultimately, the right style is the one that tells your story best. If you’re aiming for that huge, blockbuster feel, you might want to dive deeper into how to create cinematic-style intros, which often use powerful 3D visuals and dramatic timing to make a huge impact. This planning stage makes sure every single element works together to create something truly memorable.
Gathering Your Creative Ingredients
A great video intro is like a perfect recipe—it’s only as good as the ingredients you use. Before you even think about animating, the smartest thing you can do is get all your creative assets—your logo, fonts, and sounds—ready to go. Trust me, this little bit of prep will save you so much time and make the whole process way easier.
Think of it as getting all your cooking ingredients chopped and measured before you start. I always create a special folder for my project to hold the logo, any specific fonts, and the audio files I plan to use. This keeps me organized and lets me focus on being creative when I finally open my editing software.
Your Logo The Right Way
Let’s get one thing straight about your logo: it’s the star of the show. It’s super tempting to just grab a JPEG or PNG from your website, but for video, that’s a recipe for a blurry, pixelated disaster.
You absolutely need a vector logo file. These are usually saved as .AI (Adobe Illustrator) or .EPS files. Unlike normal images made of pixels (like JPGs), vectors are built with math. That means you can stretch them to any size—even for a massive 4K TV—and they will stay perfectly sharp and clean.
A low-quality logo is the fastest way to make an intro look amateur. I can’t say this enough: always start with a vector file. It’s a must-have for a polished look that looks great on any device, from a phone to a giant TV.
If you don’t have a vector version, ask the designer who made your logo for it. It’s a super important file to have for any kind of branding project, especially when you’re figuring out how to make a video intro.
Fonts That Fit Your Vibe
Your font choice says a lot about your brand’s personality. The text in your intro needs to do two things really well: be easy to read and be on-brand. If your audience has to squint to read your name, even for a split second, the intro isn’t doing its job.
Think about what different font styles say:
- Serif fonts (like Times New Roman) often feel traditional, trustworthy, and classic.
- Sans-serif fonts (like Arial or Helvetica) come across as modern, clean, and straightforward.
- Script fonts can feel personal and fancy, but use them carefully—they can be hard to read quickly.
The key is to be consistent. Make sure the fonts you pick here match what you’re already using on your website, thumbnails, and other social media.
Finding the Perfect Soundtrack
Audio is the secret sauce that brings your visuals to life. The right music or sound effect can instantly set a mood and make your brand way more memorable. Music triggers powerful emotions, so this is your chance to make your audience feel something about your brand in just a few seconds.
The golden rule here is to only use royalty-free audio. Grabbing a copyrighted song from your favorite artist is a guaranteed way to get your video muted or taken down. Luckily, there are some amazing resources out there for creators.
- YouTube Audio Library: A fantastic free option with a huge collection of music and sound effects.
- Epidemic Sound & Artlist: These are subscription services, but their amazing, high-quality libraries are what many top creators use.
Once you’ve found the perfect track, drop it into that project folder with your logo and fonts. With all your ingredients gathered, you’re ready for the fun part. If you want a head start, checking out a library of professional video intro templates can be a great way to find inspiration and a solid foundation to build on.
Choosing the Right Tools for the Job
Alright, you’ve got your creative ingredients ready. Now it’s time to head into the workshop where your intro will actually come to life. Figuring out how to make a video intro can feel a bit overwhelming with all the software out there, but you don’t need a Hollywood budget or years of training to get amazing results. It’s all about picking the right tool for what you want to do.
Choosing the essential video editing tools is a big decision. The software you pick will control everything from simple text animations to complex, movie-like worlds.
Let’s walk through the main options you have. We’ll cover everything from having total creative control to using super-fast templates. Each path has its own pros and cons, and the best choice really depends on your goals, your schedule, and how much you want to DIY.
For Maximum Creative Freedom
If you’re the kind of person who wants to control every little detail, then you’ll want to dive into professional software. These are the powerful tools the pros use for the incredible motion graphics you see every day.
Adobe After Effects: This is the king of 2D motion graphics. Seriously, if you’ve seen a cool animated logo or text effect on YouTube, it was probably made in After Effects. It gives you total control over shapes, text, effects, and timing, letting you build a completely custom intro from scratch.
Blender or Cinema 4D: Dreaming of something with more depth and realism? 3D software is where it’s at. Programs like Blender (which is free!) or Cinema 4D let you build three-dimensional objects, add realistic textures and lighting, and create epic camera movements for a truly cinematic feel.
Sure, learning to use these tools can be tough at first. But the payoff is huge. Mastering them is a skill that opens up a world of creative possibilities far beyond just making a video intro.
The Smart Shortcut Using Templates
Let’s be real for a second: not everyone has the time or desire to become a motion graphics expert. This is where the biggest time-saving secret in video creation comes in: professional templates.
A great template isn’t a crutch; it’s a launchpad. It gives you the complicated animation work already done, so you can focus on the fun part—customizing it to make it uniquely yours.
Think of it this way: an expert has already built the powerful engine and body of a race car. You just get to give it a custom paint job, put your logo on the hood, and tune it to your liking. This process gives you a final product that looks and feels custom-made in a tiny fraction of the time.
This is the exact idea behind Priyansh Animations. We build super-detailed, professional templates in software like After Effects and Blender. You just pick a style you love, send us your text and logo, and we handle the customization to match your brand perfectly. It’s the perfect mix of pro-level quality and zero-stress creation.
The Rise of Smarter Video Creation
The technology for making videos is getting better and better, fast. The demand for cool content is so high that product videos have been shown to boost engagement on shopping sites by 47%. To keep up, a huge 84% of marketers are now using AI tools in their video creation process to personalize intros and make them more effective.
This just shows how important it is to make high-quality videos quickly. Whether you get there with advanced software, AI help, or expertly designed templates, the goal is the same. For most creators and businesses, using pre-built templates is the smartest way to make amazing intros without the massive learning curve.
If you’re looking for tools that make this even easier, be sure to check out our guide on the top online intro creators available today.
Getting a Perfect Export Every Time
You’ve put all this effort into creating an awesome intro, but the final step—exporting—can make or break it. If you get the settings wrong, you could end up with a blurry mess or a file so huge it takes forever to upload. Let’s make sure that doesn’t happen.
Think of it like this: you just baked an amazing cake. The export settings are the box you use to take it to the party. The wrong box will crush it and ruin all your hard work. We need to make sure your intro shows up looking just as good as it did in your editor.
Your Go-To Settings for Online Video
Let’s cut through all the technical stuff. For pretty much any online platform—YouTube, Instagram, you name it—your best friend is the MP4 format using the H.264 codec.
This combo is the standard for a reason. It does an amazing job of shrinking your video into a small file size without ruining the visual quality. That means fast loading times for your viewers and a sharp, professional look for you. H.264 gives you the perfect balance of quality and compatibility.
Nailing the Bitrate
Once you’ve picked H.264, you’ll see a bunch of other options. Don’t let them freak you out. The most important one for quality is the bitrate.
Bitrate is just the amount of data used for each second of video. If it’s too low, your video will look blocky and gross. If it’s too high, your file will be gigantic for no good reason. Here are my go-to numbers:
- For 1080p (Full HD): I always aim for a bitrate between 8 to 15 Mbps (megabits per second). This range keeps the animation looking smooth and crisp without making the file huge.
- For 4K (Ultra HD): To keep all that beautiful detail, you need more data. I recommend setting your bitrate between 35 to 55 Mbps. This makes sure your 4K intro actually looks like 4K.
Your export settings are the final quality check. A few minutes spent getting them right ensures all your hard work pays off when you hit publish.
The Secret to Seamless Playback
One last thing, and it’s a big one: frame rate. This needs to match the frame rate of the main video you’re adding the intro to.
If your intro is made at 30 frames per second (fps) but your main video was filmed at 24 fps, you’re going to see a weird, jerky jump when the two clips meet. It just looks unprofessional.
Always check the settings of your main video first, then set your intro’s export to the exact same frame rate. This simple step is the key to a smooth, pro-level viewing experience.
Simple Tricks for a Standout Intro
Alright, you’ve built and exported your animation. Now it’s time for the final touches. These are the little details that can take an intro from just “good” to something that genuinely hooks people and feels professional.
Think of these as the insider tips that really make an intro work. It’s all about understanding that you have just a few seconds to make a great impression.
Hook Them in the First Two Seconds
Online, the first two seconds are everything. That’s your entire chance to stop someone from scrolling right past your video. People watch a ton of content—the average person now spends 84 minutes a day watching videos, and with video making up about 83% of all internet traffic, you’re fighting for every second of attention.
Your intro needs an immediate punch. This could be a unique sound, a flash of your brand color, or a quick, cool animation. Whatever you choose, it has to be fast and memorable.
Keep Your Style Consistent
Your intro isn’t just a separate clip; it’s the front door to your video. To make the viewing experience feel smooth, the style has to match what comes next. A slick, corporate intro feels totally weird if it leads into a casual, handheld vlog. That sudden change can be jarring for a viewer.
To keep it consistent, just ask yourself a few simple questions:
- Do the colors match? Your intro’s colors should look good with your video’s colors and your overall brand.
- Does the energy level fit? A high-energy intro should lead into equally energetic content.
- Is the music a good transition? The intro music should set the right mood, not clash with the sound in the rest of your video.
The best intros feel like they belong. They’re like a perfect handshake, welcoming the viewer into your video without feeling random or tacked on.
Polish Your Audio
Finally, let’s talk about sound. The audio needs to be crisp and cool, but it should never be crazy loud. I’ve seen it a thousand times: the intro music is way louder than the person talking in the main video, forcing viewers to dive for the volume button. That’s an instant turn-off.
Always check your audio levels to make sure the sound flows smoothly from the intro to your video. The intro should be powerful, not startling. A simple trick is to add a quick fade-out at the very end of your intro’s audio—it creates a much cleaner transition into your main content. For more ideas, check out our guide on creating a professional intro for your YouTube channel.
Answering Your Top Questions About Video Intros
Even with a solid plan, you probably still have a few questions. That’s totally normal. Making the perfect video intro involves a few key decisions, so let’s clear up some of the most common things people ask.
How Long Should My Video Intro Actually Be?
Keep it short. Seriously. The sweet spot is anywhere from 3 to 7 seconds.
That’s just enough time to show off your brand and set the mood without making anyone impatient. Go any longer, and you’re basically asking viewers to click away before your real video even starts.
For super fast-paced platforms like TikTok or Instagram, you’ll want to stay closer to that 3-second mark to match the quick, scroll-happy vibe.
What’s the Best Software if I’m a Total Beginner?
If you’re just starting out, template-based online video makers are a great choice. They help you get something cool made quickly.
But if you want to learn a skill that will be useful for years, my advice is to learn Adobe After Effects. It’s what the pros use for a reason.
Pro Tip: Don’t want to start from a blank screen? Grab a high-quality After Effects template. It’s the perfect middle ground—you get a professional-looking intro while also learning how the software works by seeing how a pro project is put together. It’s the best of both worlds.
Where Can I Find Music That’s Safe to Use?
This is a big one. You have to use licensed music to avoid copyright strikes, which can get your channel in serious trouble. Luckily, you’ve got some great options.
- Paid Libraries: If you have a small budget, services like Epidemic Sound or Artlist are what many pro creators use. The quality and selection are amazing.
- Free Resources: Don’t want to spend money? The YouTube Audio Library is your best friend. It’s full of free-to-use music and sound effects that won’t get you in trouble.
Should I Go With a 2D or 3D Animation?
This really depends on your brand’s vibe and the story you want to tell. Neither one is “better,” they just communicate different things.
2D animation often feels clean, modern, and direct. It’s a perfect fit for business videos, tutorials, or educational content where being clear is the most important thing.
On the other hand, 3D intros have that epic, movie-like feel. This style is awesome for gaming channels, tech reviews, or any brand that wants to look super high-quality from the very first second.
Ultimately, just pick the style that feels right for your brand.
Ready to skip the learning curve and get a stunning intro today? At Priyansh Animations, we live and breathe this stuff. We create custom video intros that make your brand look incredible. Just pick a design, give us your details, and we’ll deliver a polished, professional intro that hooks your viewers right away.
Explore our collection of video intro templates and get started!