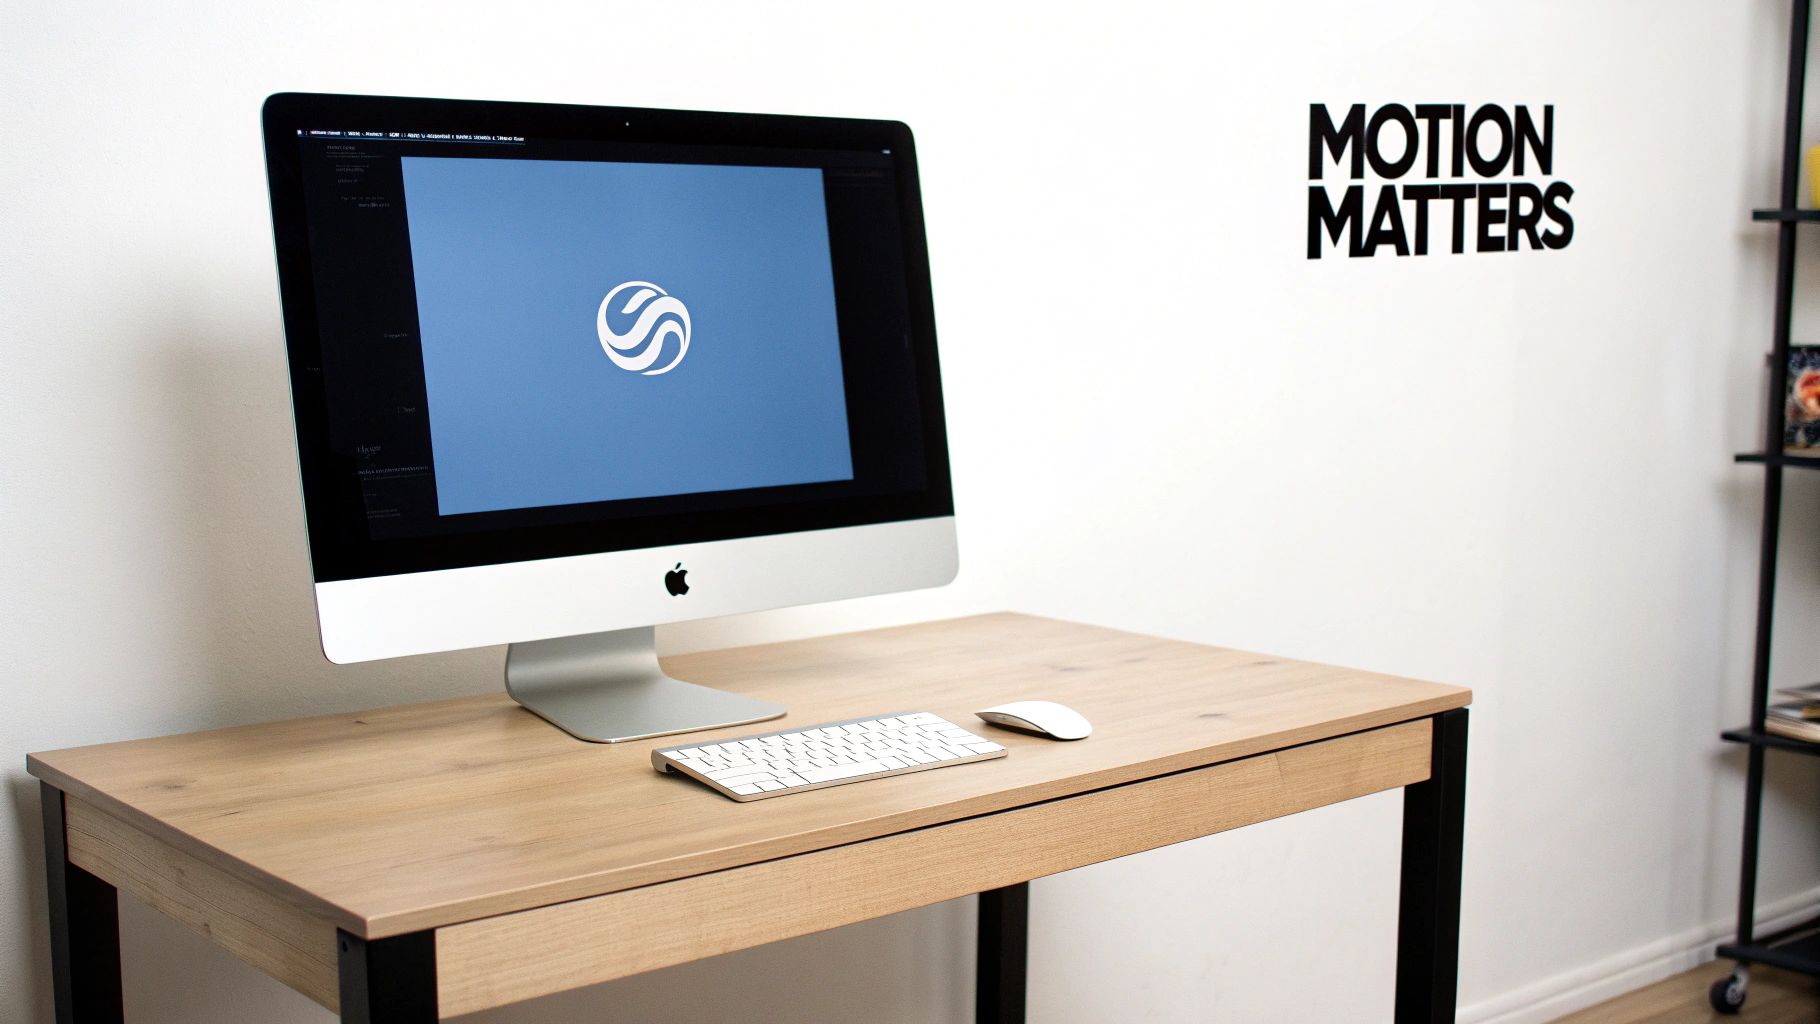
So, what does it actually mean to animate a logo? Imagine taking your brand's regular, still logo and bringing it to life with movement. It’s like giving it a personality! Usually, you start with a clean, high-quality version of your logo called a vector file. Then, you use a program like Adobe After Effects to make it move, slide, and appear in a cool way. The goal is to create a short, eye-catching clip that tells a little story about your brand and makes people remember you.
Why a Moving Logo Makes a Real Difference
Ever been scrolling online or watching a video, and a brand's logo just stuck in your head? Chances are, it was moving. A still logo is just a picture, but an animated one tells a story. It grabs your attention and feels way more exciting. Think of it like this: a picture of a car is cool, but a video of it racing down a track? That’s unforgettable.
Adding motion isn’t just a fancy trick; it’s a smart way to make your brand feel modern and memorable. Our eyes are naturally drawn to movement, after all. Even a simple animation can make your brand look more professional and polished than others who are still using still images.
Make Your Brand Unforgettable
Think of a logo animation as a tiny, super-powered commercial. In just a few seconds, it can show off your brand's whole personality. Is your brand fun and playful? A bouncy, energetic animation can show that. Is it sleek and techy? A smooth, futuristic reveal can get that feeling across instantly. This visual hook helps your audience connect with you on a much deeper level.
And the best part? You don't need to be a Hollywood animator to do this. This guide will give you a clear roadmap for the whole process, including how to turn your new creation into a cool video intro. We’ll skip the confusing jargon and get right to what you need to know.
A great logo animation does more than just look cool; it captures your brand's personality, making it instantly recognizable and hard to forget.
Tap Into a Growing Trend
The power of animation isn't just a guess; it's a huge business trend. The global animation market is blowing up and is expected to be worth up to $462 billion by the end of 2025. This massive growth just proves how important visual storytelling has become for businesses everywhere.
Here’s a sneak peek at what you'll learn in this guide:
- Getting Your Files Ready: We'll explain why vector files are your best friend and how to prepare them for animation.
- Choosing Your Tools: You'll get a simple overview of the best software for the job, from pro-level apps to easy online makers.
- Mastering the Movement: Learn the basic tricks that make animations look smooth and professional, not clunky.
- Exporting Like a Pro: Find out how to save your final animation so it looks great anywhere, from YouTube to your email signature.
By the end of this, you'll see that animating a logo isn’t as scary as it sounds. You’ll have the know-how to create something that really makes your brand stand out.
Get Your Logo Ready for Motion
Before you can make a single part of your logo dance across the screen, you have to get your files in order. This prep work is the most important thing you can do to avoid major headaches later. I know it’s tempting to just grab that JPG from your website and throw it into an editor, but trust me, that's like trying to build a LEGO castle when all the bricks are glued together.
So, where do you start? With the right kind of file. For huge companies, you might even need to learn how to use a company logo API to get the correct, approved logo. But for most of us, it all comes down to understanding one key difference: raster vs. vector.
Why Vectors are a Must-Have
You’re probably familiar with raster files like JPGs and PNGs. They're made up of a grid of tiny squares called pixels, which is great for photos. The problem is, when you try to make them bigger, they get blurry and pixelated. Even worse, a raster logo is just one flat image. You can slide the whole thing around, but you can’t animate its individual pieces.
This is where vector files come in to save the day.
Formats like .AI (Adobe Illustrator) or .SVG (Scalable Vector Graphics) are built differently. They use math—lines and points—instead of pixels. This means you can stretch them from the size of a tiny icon to a giant billboard in Times Square, and they’ll stay perfectly sharp.
For anyone animating a logo, being able to resize it is a huge plus. But the real magic is that vector logos are built from separate shapes. That's the secret to bringing them to life.
Breaking Down Your Logo, Layer by Layer
Think of your logo like a model you need to animate. First, you have to carefully take it apart. If your logo has a symbol and some text, you’ll want to separate the symbol from the text. If the symbol itself is made of three different shapes, you’ll want to separate those, too.
This is best done in a vector editor like Adobe Illustrator or a great free alternative like Inkscape. The goal is simple: put every piece you want to move on its own separate layer.
Here’s an example for a made-up "Aura Glow" logo:
- Layer 1: The "Aura" text
- Layer 2: The "Glow" text
- Layer 3: The sunburst symbol
- Layer 4: The outer ring around the symbol
Separating your logo this way gives you total creative freedom. Now you can make the sunburst fade in, the outer ring draw itself on, and then have the text slide in from opposite sides. None of that is possible with a flat JPG.
My biggest piece of advice: Name your layers! A file filled with "Layer 1," "Layer 2 copy," and "Layer 27" is a recipe for confusion. Get into the habit of using clear names like "Icon-Sunburst" or "Text-Tagline." Your future self will thank you.
File Formats for Logo Animation
Choosing the right file format from the start will make your whole animation process smoother. While you can sometimes make other formats work, using a proper vector file is what separates the pros from the beginners.
Here’s a quick guide to what you should use and what to avoid.
| File Type | Best For | Why It's Great | The Downside |
|---|---|---|---|
| .AI / .EPS | Professional Animation | Layers are kept separate, fully editable, and can be scaled to any size. | You need special software like Adobe Illustrator to create and edit them. |
| .SVG | Web Animation | Scalable, small file size, and works great on websites and in most software. | Can sometimes act weird with complex effects in certain programs. |
| .PNG | Simple Motion | Supports transparent backgrounds, making it easy to put on top of video. | It's a flat, pixel-based image, so you can't animate individual parts. |
| .JPG | Not Recommended | Everyone can open it and it has a small file size, good for regular pictures. | No transparency, pixel-based, and completely flat. Not good for animation. |
At the end of the day, a layered .AI file is the best choice, especially if you're working in a tool like Adobe After Effects.
Once your logo is properly layered and saved, you’re ready for the fun part. Taking a little extra time here ensures that when you import that file, everything is organized, editable, and ready to be brought to life.
Choosing the Right Animation Software
Alright, you've got your logo file prepped and ready for action. Now for the exciting part: picking your creative playground. The world of animation software is huge, but don't worry—you only need to focus on a few key options to get started. The "best" tool really just depends on what you want to create, your budget, and how much time you want to spend learning.
Think of it like choosing a car. Do you need something reliable for everyday trips (2D animation)? Or are you planning an off-road adventure that requires something more powerful (3D animation)? Let's break down the main options so you can find the perfect fit.
This quick decision tree shows how your file type points you in the right direction before you even start animating.
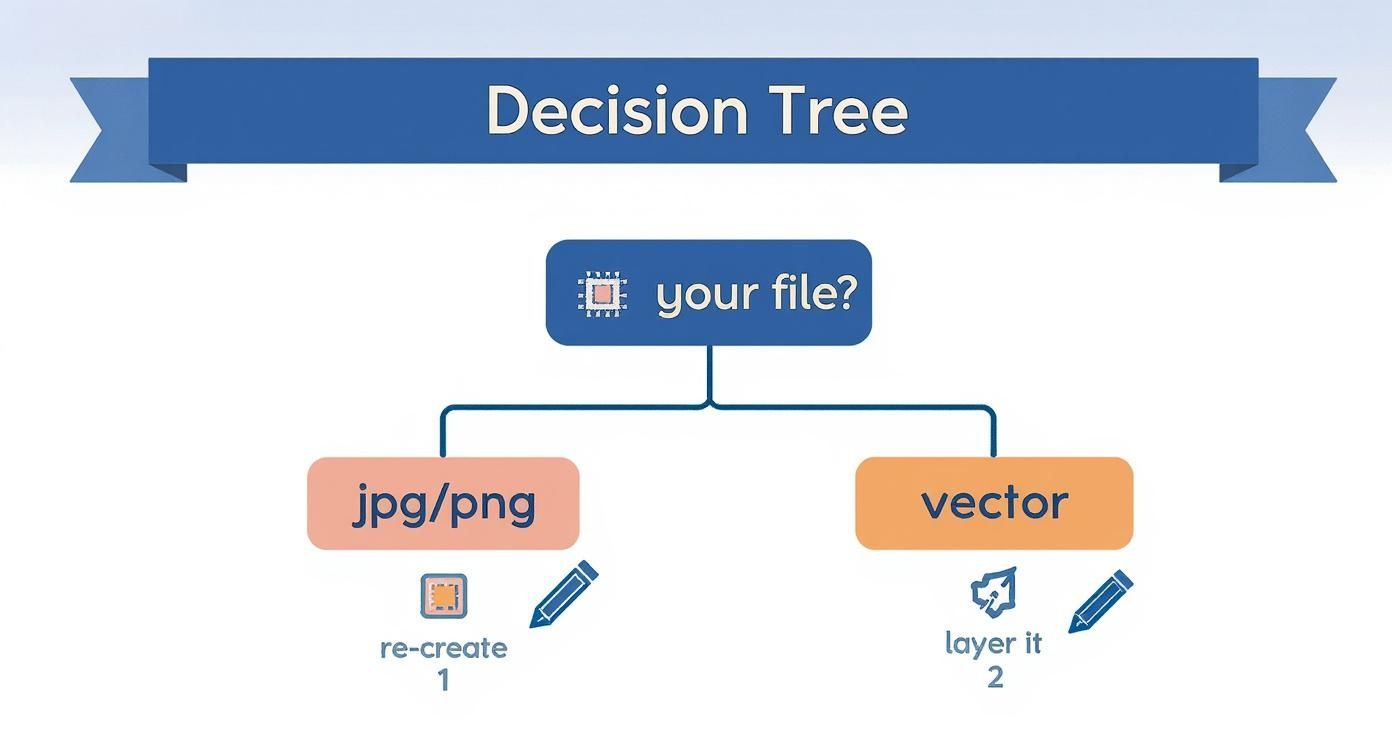
As you can see, starting with a vector file is the easiest path. It saves you the headache of having to rebuild your logo from scratch.
Adobe After Effects: The 2D Powerhouse
When it comes to 2D logo animation, Adobe After Effects is the king of the castle. It’s what the pros use for a reason. Its powerful timeline, huge library of effects, and how well it works with Adobe Illustrator make it the top choice for most designers.
If you have a layered Illustrator file, you can bring it straight into After Effects and—bam!—all your layers are preserved and ready to move. This is exactly what you need for creating those slick, modern animations you see all over YouTube and company websites.
Best for:
- Clean, sharp 2D animations.
- Projects that need to work well with other Adobe apps like Illustrator and Photoshop.
- Animating individual logo parts with perfect control over how they move.
After Effects can do a ton, but the good news is you only need to learn a small part of it to create an awesome logo animation.
Diving into the World of 3D
Sometimes, 2D just isn't enough. You want your logo to feel like it has weight, depth, and realism. That's where 3D software comes in. These tools let you turn your 2D logo into a three-dimensional object, then add lighting, textures, and camera movements for a truly movie-like feel.
3D animation opens up a whole new world of creativity. You can make your logo look like it’s made of metal, shattering into pieces, or building itself from futuristic parts.
This is definitely a step up in difficulty, but the results can be mind-blowing.
Blender: The Free and Mighty Option
Blender is a total game-changer. It's a professional-level 3D program that is 100% free. It can do everything from creating 3D models to animation and video editing. For logo animation, you can import an SVG file, turn it into a 3D shape, and start building your scene.
It can take a while to learn, but the community is huge, and there are tons of free tutorials online. If you're on a budget but have the time to learn, Blender is an amazing choice.
Cinema 4D: The Motion Designer’s Favorite
Cinema 4D has long been a favorite for motion graphics because it’s so user-friendly. I've found, like many designers, that it's easier to pick up than other 3D programs. It's especially good at creating cool, stylized 3D animations quickly.
It also works really well with After Effects, letting you easily mix 3D objects with your 2D animations. While it does cost money, its focus on motion design makes it a top pick for pros who want to create high-end 3D logos without tearing their hair out.
Quick and Easy: Online Animation Makers
What if you need an animation right now and don’t have time to learn complicated software? This is where online intro makers are a fantastic solution. These websites give you ready-made templates where you just upload your logo, type in your text, and let the tool do all the hard work.
If you're looking for an online tool, you can explore this powerful animation maker to get started in minutes.
These are perfect for:
- Speed: Getting a professional-looking animation in minutes, not days.
- Simplicity: You don’t need any technical skills at all.
- Budget: Often much cheaper than hiring a designer or buying software.
The trade-off is you have less creative control, but for many people, it's the perfect mix of quality and convenience. A custom 10-second animation can cost anywhere from $800 to $3,300, but online tools can cut that price by 30-50%. It just goes to show how technology is making professional animation easier for everyone to access.
Bringing Your Animation to Life
Alright, this is where the real fun begins. You've done the prep work—your files are ready and you've picked your software—and now it's time to actually breathe some life into that logo.
Let’s be real, anyone can make a logo slide onto the screen. But making it bounce, stretch, and settle with style? That’s what makes a brand memorable. This isn’t about learning every single button in the software. It’s about understanding a few key ideas that make movement feel natural and cool. Once these click, you'll be creating a logo that doesn't just show up; it makes an entrance.
The Secret Sauce: Easing
Ever see an animation where something moves and it just feels… clunky? That’s almost always because the movement is too robotic. Things in the real world don't just start and stop moving instantly. They have to speed up and slow down.
That smooth start and stop is called easing. I can't say this enough: it is the single most important trick for making your animations look polished and professional. Think of a car at a stoplight. It doesn’t instantly jump to 60 mph; it gradually builds speed (ease out) and then smoothly slows to a stop (ease in).
In most animation software, you can apply easing with a simple right-click. It's the difference between a logo stiffly snapping into place and one that gracefully glides to its destination.
My number one tip for new animators is to get comfortable with the "Graph Editor." I know, it looks like a scary math graph at first. But it’s your best friend for perfecting your easing. It shows you a curve of your animation's speed, and you can tweak it until every movement feels just right.
Finding Your Rhythm With Timing And Spacing
Timing is all about when and how fast things move. It’s what gives your animation its personality. Quick, snappy movements feel energetic and exciting. Slow, smooth motion can feel elegant, heavy, or serious.
Spacing works together with timing. It’s about how far something travels between each frame of the animation.
- Close Spacing: When frames are close together, the object moves slowly. You'll see this at the beginning and end of a movement.
- Wide Spacing: When frames are spread far apart, the object moves quickly. This is for the middle of a fast action.
The classic bouncing ball exercise is the perfect way to master this. The ball speeds up as it falls (wide spacing), slows down as it reaches the top (close spacing), and squashes when it hits the ground. Understanding that rhythm is key. For more detailed control, you can explore the concept of time remapping in After Effects, which lets you speed up and slow down specific parts of an animation.
Giving Your Logo Personality
Once you’ve nailed easing and timing, you can start adding some character. This is where you connect the motion to the brand itself. Is your brand playful? Maybe the letters of the logo bounce into place one by one. Is it a tech company? A subtle digital glitch effect could be a perfect fit.
Here are a few classic animation tricks to get you started:
- Anticipation: A small backward movement before a big forward action. For a logo, this could be a slight shrink just before it scales up onto the screen.
- Overshoot: Pushing an action a little past its final spot before it settles back. This adds a fantastic, springy feel to the movement.
- Follow-Through: When the main part of your logo stops, smaller bits keep moving for a moment. Think of how a cape continues to flow after a superhero lands.
As you start experimenting, understanding the core motion graphics principles will be your guide. These aren't just tricks; they're techniques that turn a simple animation into something truly special.
And people are noticing. The animation market is expected to grow by 7.55% each year between 2025 and 2034, mostly because it’s such a great way to communicate ideas.
Adding The Final Polish
Never forget the finishing touches. Small details can take your work from good to great. A subtle drop shadow can add depth, making the logo feel like it's really there. A well-placed glow or lens flare can highlight the most important moment of the animation.
And please, don't forget sound! Even a simple swoosh as the logo appears or a soft click as a piece locks into place can make the animation feel 10x more powerful. Good sound design is the secret ingredient that really sells the animation.
Ultimately, the goal is to create movement that feels like it has a purpose and truly reflects the brand. Don't just make it move—make it move with style.
Exporting Your Animation for Any Platform
You did it. Your animation is perfectly timed, the movement is buttery smooth, and your logo looks amazing. But don't celebrate just yet—all that hard work can go to waste if you mess up the final step: exporting.
Getting your settings right ensures your animation looks just as sharp and clean online as it does in your editor. It can feel a bit technical, but it’s really just about matching your file to where it's going to be seen. An animation for a YouTube intro has totally different needs than a tiny GIF for an email signature, and I'll walk you through the basics.
Your Go-To Format: The Trusty MP4
When in doubt, MP4 (using the H.264 codec) is your best friend. It’s the universal language of online video. It just works—on pretty much every platform, browser, and phone you can think of. The magic of H.264 is that it gives you great quality without creating a gigantic file.
Think of it as an expert packer for your video. It squishes everything down so it's easy to upload and stream, without turning your sharp animation into a blurry mess. If your logo is going on a website, a social media post, or a standard video, MP4 is almost always the right choice.
My Two Cents: Pay attention to the "bitrate" setting when you export. A higher bitrate means better quality but a bigger file. For a short, full HD (1920×1080) logo animation, I usually aim for a bitrate between 8-12 Mbps (megabits per second). It’s a great sweet spot.
The Secret to Transparency
What if you need to place your logo animation on top of other video footage? That's where you need a transparent background. A normal MP4 won't work; it will just show a solid black or white box behind your logo. To keep that background see-through, you need a format that supports an "alpha channel."
Here are your two best options:
- QuickTime .MOV (with Apple ProRes 4444): This is the top choice for pros. It gives you perfect quality and perfect transparency. The only catch? The files are huge. This format is best when you're sending the file to a video editor, not for uploading directly to a website.
- WebM: This is a fantastic, modern format made for the web. It supports transparency and delivers great quality with much smaller file sizes than a MOV. It’s the perfect solution for putting a logo with a transparent background directly onto a website.
To get that transparency, look for a setting in your export menu called "Channels" or "Color" and choose "RGB + Alpha." That "Alpha" part is what tells the video file to keep the background transparent.
Choosing The Right Settings for Each Platform
The final piece of the puzzle is all about delivery. The settings you choose depend completely on where your animation is going to live. If you're looking for more general tips on making your videos look good, these video editing tips for beginners are a great place to start.
To make things super simple, here's a little cheat sheet for the most common places you'll use your animation.
Recommended Export Settings for Common Platforms
This handy table should help you nail your export settings every time, whether you're uploading to social media or putting it on a website.
| Platform/Use Case | Recommended Format | Key Settings | Notes |
|---|---|---|---|
| YouTube/Vimeo | .MP4 (H.264) | 1920×1080 or 4K resolution, 10-15 Mbps bitrate. | The most common and reliable choice for high-quality video sites. |
| Website Hero Section | WebM | Use "RGB + Alpha" if you need transparency. Keep bitrate low (2-5 Mbps). | Optimized for fast loading times while keeping a transparent background. |
| Social Media Posts | .MP4 (H.264) | Square (1080×1080) or vertical (1080×1920) size. | Social media sites compress video a lot, so start with a high-quality file. |
| Email Signature | Animated GIF | Reduce colors to 128 or 64. Keep it small (e.g., 300px wide). | File size is everything here. Aim for under 200 KB if you can. Quality will be lower. |
| Video Editing | .MOV (ProRes 4444) | Use "RGB + Alpha" for transparency. | Use this as a high-quality "master file" to place over other video clips. |
By taking a moment to think about where your animation is going, you make sure all your hard work pays off. A little attention to detail here ensures your animation looks professional and performs perfectly, no matter where it's seen.
Got Questions About Animating a Logo?
Even with the best guides, you're going to have questions. It happens to everyone. Getting stuck is just part of the learning process, but having the answers ready can save you a ton of time and frustration.
Let's go over some of the most common questions that pop up, especially for people just starting out. These aren't textbook answers; they come from years of doing this and seeing where people get tripped up.
How Long Should My Logo Animation Be?
This is a big one, and thankfully, the answer is simple: keep it short and sweet.
For most uses, the sweet spot is somewhere between 3 and 7 seconds. That's just enough time to grab attention and make an impression without boring your audience. Remember, you're creating a memorable moment, not a mini-movie.
- Website loaders or quick transitions? Go for a super-fast 2-4 seconds. It needs to be quick and clean.
- Video intros or outros? You can stretch it out a bit here, so 5-7 seconds is perfect.
Here's the golden rule I always follow: ask yourself, "Is every single second of this animation doing something important?" If not, start cutting. A short, impactful animation will always be better than a long, boring one.
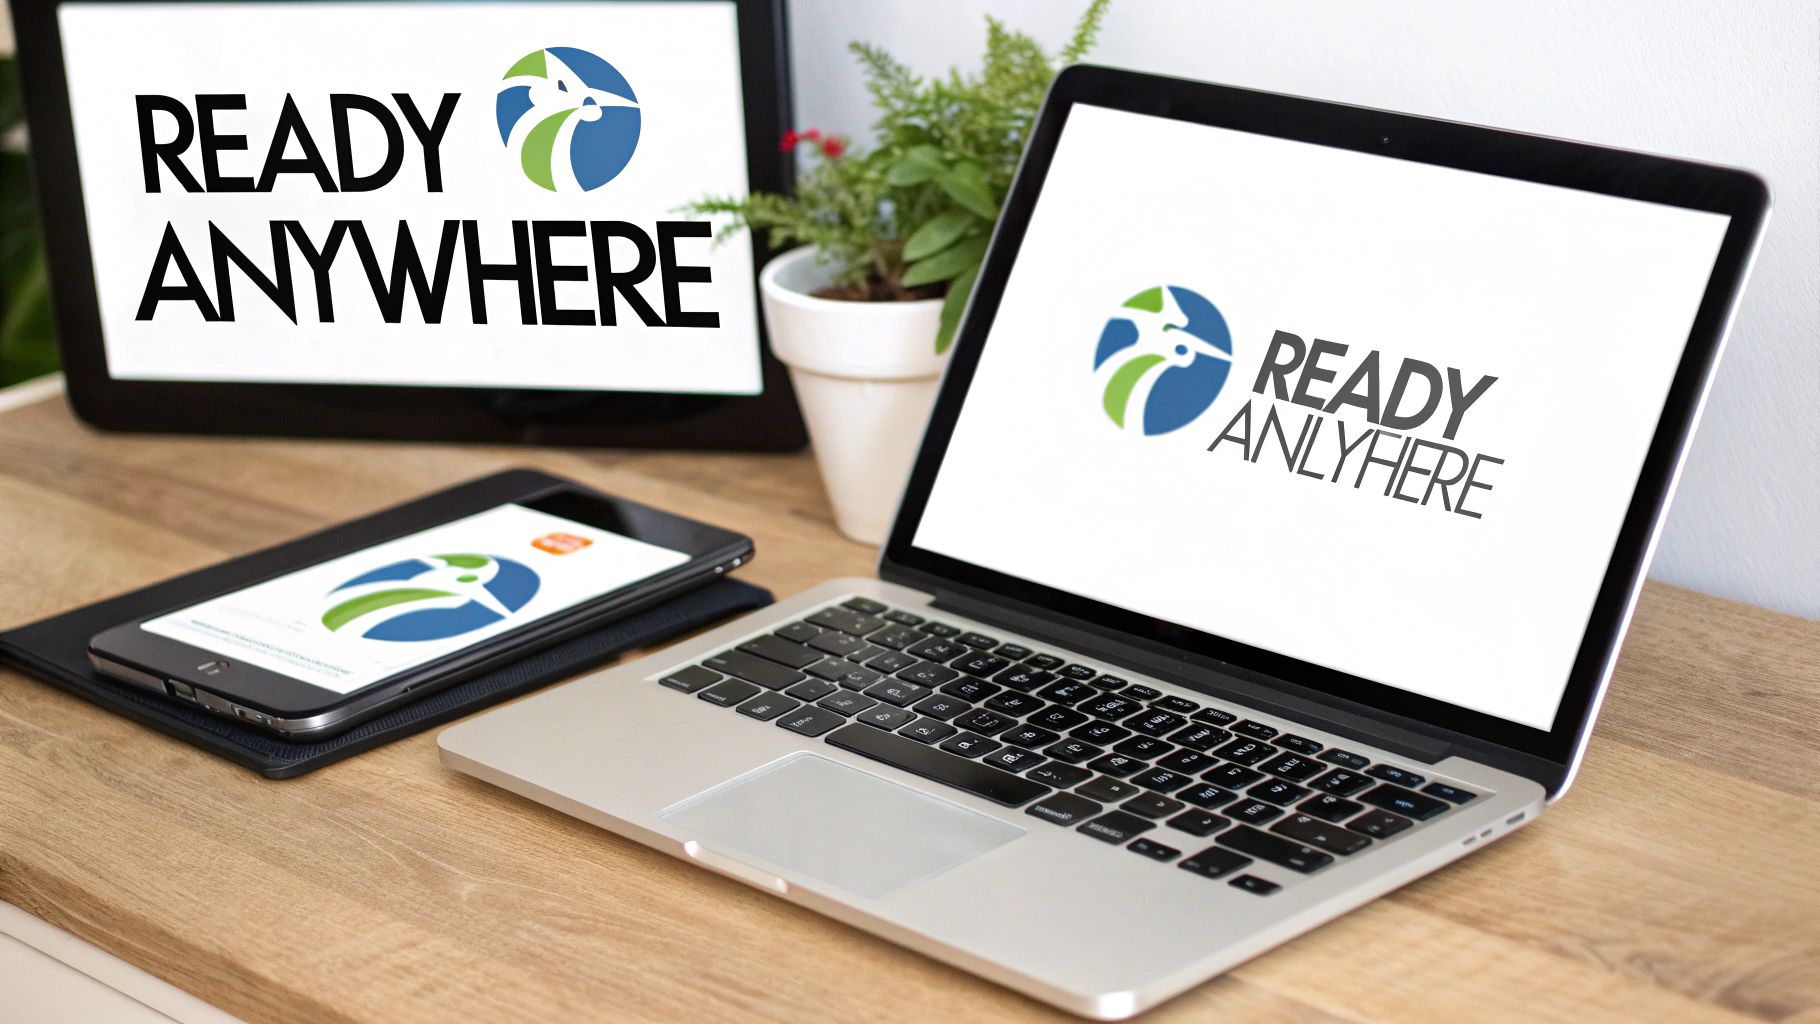
Can I Animate a JPG or PNG Logo?
So, you technically can, but you really, really shouldn't. Trying to animate a flat image like a JPG or PNG is like trying to make a puppet out of a photograph. You can make the whole photo slide around, but you can't make the person in it wave their arm.
With a flat file, you can only move the entire logo as one block. You can fade it in, make it bigger, or slide it around, but that’s about it. You lose the ability to animate the individual parts—a letter, a swirl, an icon—which is where all the cool stuff happens.
For any real animation, you need a vector file—like an .AI (Adobe Illustrator) or .SVG file. If all you have is a JPG, your first step should be getting that logo redrawn as a proper vector.
What Are the Biggest Beginner Mistakes to Avoid?
It's easy to get carried away when you first start, but a few common mistakes can scream "amateur." Knowing what they are ahead of time will put you way ahead of the game.
Here are the top three I see all the time:
- Robotic, Lifeless Movement: This is the most obvious sign of a beginner. When things move from point A to point B at a constant speed, it just looks fake. Always use easing to give your movement a natural-feeling acceleration and deceleration. It makes everything feel smoother and more professional.
- Doing Way Too Much: Just because you can make every letter spin, bounce, and explode with lens flares doesn't mean you should. Great animation has a purpose. Focus on one or two key ideas that match the brand's personality. Simple is almost always more powerful.
- Forgetting About Sound: A silent logo animation feels incomplete. Sound design is a huge part of the experience that often gets ignored. Adding a simple "swoosh," a subtle "click," or a light musical sound can make your animation feel 100% more polished and complete.
Avoiding these traps will instantly make your work look better. For more answers to common creative questions, you can also explore our full FAQ page.
Ready to skip the learning curve and get a stunning, professional logo animation today? At Priyansh Animations, we specialize in creating custom video intros from a huge catalog of high-quality templates. Just pick a design, send your text, and let us handle the rest. Check out our intro templates and get started in minutes!